Table of Contents
ToggleA Brief Introduction To 3D Printers

Using a digital model, 3D printing, commonly referred to as additive manufacturing, creates three-dimensional items. In contrast to conventional manufacturing techniques, which entail removing material from a solid block to create an item, 3D printing adds material layer by layer to create an object. A digital model is created using computer-aided design (CAD) software or by scanning an existing object. The model is then divided into layers using slicing software, and the product is printed using a 3D printer.
Fused Deposition Modeling (FDM), Stereolithography (SLA), and Selective Laser Sintering (SLS) are three different types of 3D printers. In FDM printers, the object is made by melting plastic filament and extruding it through a nozzle. SLA printers construct the item using a liquid resin that is hardened by a UV light.

SLS printers produce the product by using a laser to combine powdered components, such as nylon or metal. Numerous industries, including prototyping, product design, architecture, and the fields of medicine and dentistry, can benefit from 3D printing. Complex geometries that would be difficult or impossible to produce using conventional manufacturing techniques may now be produced more quickly and affordably.
However, there are some difficulties with 3D printing. There are restrictions on the types of materials and item sizes that can be printed because the technology is still in its early stages.
The procedure can be time-consuming, and variables like the printer settings and the design quality might have an impact on the print quality. Despite these difficulties, 3D printing has grown in acceptance and availability; both home and commercial 3D printers are now readily available. As technology develops, it can fundamentally alter how we produce and create, opening up new options for both organizations and individuals.
Understanding 3D Printing Terminology

Anyone who wants to participate in this exciting technology must understand the terminology associated with 3D printing. These are some keywords to understand.
- Filament: The substance used in Fused Deposition Modeling (FDM) 3D printers is called a filament. Usually, it is constructed of plastic, such as PLA or ABS.
- Additive Manufacturing: Adding layers of material one at a time to create a 3D item is known as additive manufacturing
- Resin: The substance utilized in 3D printers using stereolithography (SLA). It is a liquid that, when subjected to UV radiation, becomes solid.
- Slicing: A 3D model is divided into small layers called slices so that a 3D printer can print them.
- Support: Extra material used during 3D printing to hold up model elements that protrude outward.
- Raft: The initial layer of the 3D-printed object that gives the model a secure foundation.
- Build Plate: The area on which the object is printed by a 3D printer.
- Bed adhesion: A print’s capacity to adhere to the build plate while it is being printed.
- Layer Height: The thickness of each layer of material used in 3D printing is referred to as layer height.
- Infill: The internal framework of a 3D object, which may be altered to alter the print’s strength and weight.
- Retraction: The operation of re-feeding the filament into the extruder to avoid stringing the print together.
- Overhang: Any area of the three-dimensional item that protrudes past the framework is called an overhang.
- rim: To increase bed adherence, an object’s base is covered with a thin layer of material printed on it.
- Warping: Warping is the propensity of the printed item to curl or lift off the construction plate
- Bridging: Printing material over a space between object components is the practice of “bridging,” which might lessen the requirement for support.
You can better comprehend the 3D printing process and interact with other 3D printing aficionados if you are familiar with this important terminology. Additionally, having a firm grasp of these concepts can assist you in producing high-quality prints and troubleshooting any issues that might come up while printing.

You can better comprehend the 3D printing process and interact with other 3D printing aficionados if you are familiar with this important terminology. Additionally, having a firm grasp of these concepts can assist you in producing high-quality prints and troubleshooting any issues that might come up while printing.
Types Of 3D Printers

Since its debut, 3D printing technology has advanced significantly, and there are currently several varieties of 3D printers on the market. The process used to produce 3D things varies depending on the type of 3D printer.
The three most popular kinds of 3D printers—Fused Deposition Modeling (FDM), Stereolithography (SLA), and Selective Laser Sintering (SLS)—will be covered in this article.
The most popular kind of 3D printer is an FDM printer. These printers produce the product by melting plastic filament and extruding it through a nozzle.
Layer by layer, the molten filament is deposited by the printer as it moves the nozzle along the x, y, and z axes. FDM 3D printers are a fantastic option for beginners since they are reasonably inexpensive and simple to operate.
SLA printers construct the item using a liquid resin that is hardened by a UV light.
The resin is shaped using a laser by the printer, which causes it to solidify and attach to the construction platform. SLA printers are well-liked in fields like dentistry and jewelry creation because they generate fine, detailed prints with smooth surfaces.
SLS printers produce the product by using a laser to combine powdered components, such as nylon or metal. The build platform is covered with a layer of powder by the printer, which utilizes a laser to fuse the powder into the desired shape.
Complex forms and structures that would be challenging or impossible to make using conventional techniques may be produced with SLS printers.
Other types of 3D printers include Multi Jet Fusion (MJF) printers, which combine inkjet printing with powder fusion to build things, and Digital Light Processing (DLP) printers, which operate similarly to SLA printers but with a different kind of light source.
It’s crucial to take into account aspects like price, print quality, and the kinds of materials that may be utilized when selecting a 3D printer. Typically, FDM printers are the least priced, whereas SLA and SLS printers are more expensive but create prints of greater quality.
A printer must be able to handle the materials you want to employ since different printer types are better suited to certain sorts of materials. Learn more about the Different Types of 3D Printers.
Stereolithography History

A laser is used in the 3D printing technique known as stereolithography (or SLA) to cure resin into solid objects. The invention of stereolithography by Chuck Hull, widely referred to as the father of 3D printing, took place in the 1980s.
Hull submitted a patent application in 1983 for a method known as stereolithography that required curing liquid photopolymers into solid shapes using ultraviolet light.
To commercialize the technology, he established 3D Systems Corporation in 1986. In 1988, he unveiled the SLA-1, the first commercial SLA printer.
Early SLA 3D printers were costly and difficult, but they changed the industrial sector by enabling the quick fabrication of detailed and sophisticated products.
New materials and enhanced printing techniques have been created as SLA technology has progressed through time. SLA is being utilized in a number of sectors, including the medical, automotive, and aerospace industries.
It has become a useful tool for producing prototypes and manufacturing components because of its accuracy and capacity to construct complicated forms.
The history of stereolithography is evidence of the force of creativity and the positive effects that emerging technology may have on society.
What Is Digital Light Processing
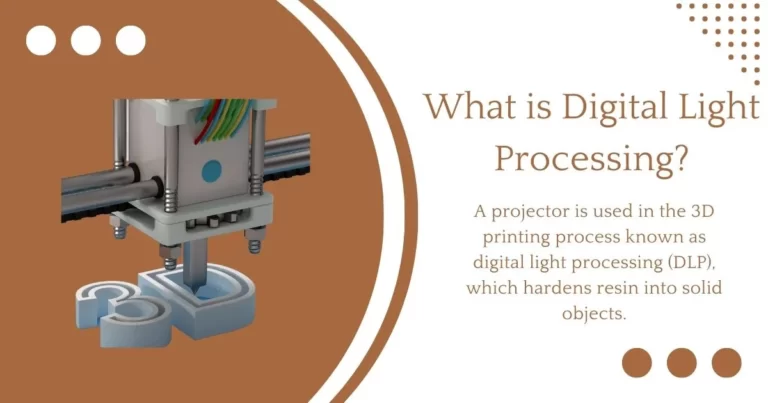
A projector is used in the 3D printing process known as digital light processing (DLP), which hardens resin into solid objects. DLP employs a projector to throw light over a vat of resin, curing it layer by layer as opposed to stereolithography (SLA), which uses a laser to cure the resin.
A 3D model is first created and then used to create layers using specialist software. The sliced model is then projected into a resin vat, with the projector curing each layer as it does so. After the item has been fully printed, it is taken out of the vat and cleaned to get rid of any extra resin.
DLP has a speed edge over other 3D printing methods. The use of a projector makes it possible to print whole layers at once, thus cutting down on printing time.
DLP can also produce things with minute features and flawless surface finishes. In the dentistry and jewellery sectors, where the capacity to produce exact, finely detailed products is crucial, DLP is frequently employed.
However, it is also utilized in other fields, such as aerospace and the automotive industries, where DLP technology can be used to print complex parts.
All things considered, digital light processing is a useful 3D printing technique that provides efficiency and accuracy for the production of intricate and precise products.
Choosing The Right 3D Printers For Your Needs

For individuals who are unfamiliar with the 3D printing industry, selecting the best 3D printer might be a difficult undertaking. Cost, print quality, and convenience of use are a few things to think about when choosing a 3D printer.
Your budget should be one of the first things you think about. Depending on the model and its features, 3D printers may cost anywhere from a few hundred to tens of thousands of dollars.
Starting with a less expensive alternative, such as a Fused Deposition Modeling (FDM) printer, may be the best course of action if you are just getting started. You can always upgrade as you acquire more expertise.
The kind of printing you intend to accomplish is a further crucial issue to take into account. A stereolithography (SLA) or digital light processing (DLP) printer would be a better option if you’re interested in producing extremely intricate and detailed designs.
It will be important to use a printer with a high build volume if you intend to create massive items.
A printer must be able to handle the materials you want to employ since different printer types are better suited to certain sorts of materials.
Another key factor, particularly for novices, is usability. It’s possible that certain printers need more technical know-how and troubleshooting abilities than others.
Look for printers with software that is simple to use and a helpful online community, such as forums and tutorials.
Each type of printer has both pros and limitations in terms of print quality. Although FDM printers are well known for their accessibility and adaptability, they occasionally result in prints with obvious layer lines.
SLA printers may be more expensive and require more care, but they also create prints with smooth surfaces that are extremely detailed.
The costliest option is the Selective Laser Sintering (SLS) printer, which can produce intricate forms and structures. The cost of Selective Laser Sintering 3D Printer starts from $200,000 but can range from $10,000 for DIY Solutions.
The name and reputation of the printer maker should also be taken into account in addition to these variables. Look for companies that have a history of creating printers of the highest caliber and offering top-notch customer service.
The best 3D printer for you will ultimately rely on your demands and financial situation. Do your homework, study reviews, and ask other 3D printing fans for ideas.
You can unleash your imagination and make your creations come to life with the appropriate printer.
How To Use A 3D Printer To Make Circuits

Circuits may be made via 3D printing, which enables the development of specialized designs and prototypes. The steps for creating circuits with a 3D printer are as follows:
- Create the circuit: The circuit must first be created using CAD software. The circuit’s architecture and geometry should be included in this design, as well as any required parts like transistors, resistors, and capacitors.
- Print the circuit: Circuits may be printed using conductive filament when their designs are finalized. The printed circuit can conduct electricity thanks to the metal flakes in this filament.
- Test the circuit: To make sure the circuit works correctly after printing, it should be tested. Connecting components and using a multimeter for testing may be required.
- Assemble the circuit: The circuit may be put together into the finished product after being tested and confirmed. Soldering parts together and attaching the circuit to a power supply may be required for this.
In general, bespoke circuits and prototypes may be made via 3D printing. It is feasible to print circuits that can conduct electricity and work as intended by utilizing conductive filament.
To produce dependable and functioning circuits utilizing 3D printing technology, it is crucial to have a firm grasp of circuit design and testing, nevertheless.
Setting Up Your 3D Printer: Assembly And Calibration
At first, setting up a 3D printer could seem difficult, but with the correct equipment and some perseverance, it can be a rather simple procedure. The following advice will help you assemble and calibrate your 3D printer:

- Unbox the Printer: Carefully remove the printer’s packaging to check that all of the parts are present. If you need to return or transfer the printer, be sure to save all of the packaging materials.
- Follow the Directions: Assembly and calibration instructions for most 3D printers are provided in great detail. Carefully follow these directions because every printer may have different needs.
- Level the Build Plate: By leveling the build plate, you can make sure that your prints adhere to the bed appropriately. The majority of printers include an integrated leveling mechanism that works by adjusting the screws holding the build plate in place until it is level.
- Check the Extruder: The extruder is in charge of melting and depositing the filament, so check it out. Make sure the extruder is installed correctly and that the nozzle is positioned so that it is at the right height from the build plate.
- Calibrate the Printer: Calibration entails changing the printer’s settings to guarantee accurate and reliable printing. This entails changing the print speed and infill as well as the extruder and bed temperatures.
- Test Print: Once the printer has been set up and calibrated, it is time to print a test page. To test the printer’s operation, choose a straightforward item to print, such as a bench or calibration cube.
These instructions will help you set up and calibrate your 3D printer correctly so you can create prints of the highest quality. When using 3D printers and materials, always put safety first. If you run into problems, refer to the manufacturer's instructions or online resources.
Materials For 3D Printing
The range of materials that may be utilized to make prints is one of the main benefits of 3D printing. A list of the most popular materials for 3D printing is provided below:
- Filaments: The most often used material in 3D printing is filament. They often come in a range of colors and are composed of plastic, such as PLA or ABS. Fused Deposition Modeling (FDM) printers employ filaments to produce objects by melting the filament and extruding it through a nozzle.
- Resins: Stereolithography (SLA) printers employ resins. They are liquid substances that become solid upon UV light exposure. Resins may generate prints with smooth surfaces that are incredibly accurate and detailed.
- Powders: SLS (Selective Laser Sintering) printers employ powders. They are often laser-fused together and constructed of metal or nylon. Strong, long-lasting prints with intricate forms and structures are possible with SLS printers
- Other Materials: Wood, metal, and ceramic are just a few of the other materials that may be utilized in 3D printing. These materials can be more expensive than conventional filaments and resins and call for specialist printers.
The qualities of each material should be taken into account while selecting one for your 3D print. Here is a list of benefits and drawbacks of the most popular materials:
Material | Pros | Cons |
PLA | Easy to print, biodegradable, low warping | Not as strong as other materials, can be brittle |
ABS | Strong, durable, and flexible | Difficult to print, warping is common |
PETG | Strong and durable, low warping | More expensive than other filaments |
Nylon | Strong and flexible, can withstand high temperatures | Requires high-temperature printing and specialized equipment |
Resin | High-quality prints with smooth surfaces, great for detailed models | Requires SLA printer and post-processing to cure the prints |
Powder | Strong and durable, can create complex shapes and structures | Requires SLS printer and post-processing to remove excess powder |
The kind of material you select for your 3D print will often depend on the specific needs of your project. Consider factors like strength, durability, flexibility, and surface polish when selecting a material.
Additionally, if you are new to 3D printing, you may want to pick a material like PLA that is user-friendly for beginners so that you can get a feel for the process. Remember to follow all safety measures and the manufacturer’s recommendations before using any material for 3D printing.
Designing 3D Models: CAD Software And 3D Scanners

The creation of 3D models is an essential step in the 3D printing process. Computer-Aided Design (CAD) software and 3D scanners are the two primary methods for producing 3D models.
Users of CAD software can build their digital representations of items. The complexity and capability of many CAD software alternatives, both free and commercial, vary.
Tinker CAD, Fusion 360, and SolidWorks are some of the most well-liked alternatives. By sketching shapes, extruding them, and combining them to make an object, users of these applications may produce 3D models.
For people who are experienced in utilizing digital design tools and who want total control over the creative process, CAD software is a fantastic choice.
On the other hand, 3D scanners enable users to make digital replicas of real-world things. These tools function by scanning the surface of an object and building a digital model from the information obtained.
There are many different kinds of 3D scanners, including portable and fixed models. Artec Eva and the Einscan Pro 2X are a couple of well-liked alternatives.
For individuals who wish to rapidly and without the need for design expertise to produce a digital model of an object, 3D scanning is a fantastic choice.
Regardless of the process used to build the 3D model, it’s critical to remember the 3D printer’s restrictions. There may be minimum and maximum print sizes for particular printers, as well as specifications for the thickness of particular model features.
The amount of detail that can be attained in the finished print will also depend on the printer’s resolution.
It’s crucial to keep the printing process in mind while creating a 3D model. Some pointers for creating models for 3D printing are as follows:
- Keeping the design basic and staying away from forms or geometries that are extremely complicated.
- Confirming the model is printable by putting it through a slicer—a program that breaks the model up into printable layers—to see if it prints.
- In places with overhangs or gaps, the model should be strengthened using support structures.
- Minimizing the number of individual pieces that must be put together after printing.
Anyone can produce incredible 3D models to be brought to life with a 3D printer by using CAD software or 3D scanners and following these guidelines.
File Formats Of 3D Printing

It’s crucial to take the file format into account while getting a 3D model ready for printing. The three most popular file types for 3D printing are STL, OBJ, and AMF. We shall examine the benefits and drawbacks of each file type in this post.
STL: The most used file format for 3D printing is STL. It works with the majority of 3D printers and renders a 3D model as a collection of triangles. STL files may be used with several CAD programs and are simple to produce and modify. However, STL files occasionally contain errors, leading to prints with imperfections.
OBJ: OBJ is a different well-liked file type for 3D printing. A 3D model is represented as a grouping of vertices, edges, and faces. When creating 3D models for video games and movies, the entertainment industry frequently uses OBJ files. OBJ files can handle more complicated shapes and are more accurate than STL files. However, OBJ files can occasionally be larger than other file formats, which can affect the speed and quality of printing.
AMF: AMF is a more recently 3D printing file format that was created to overcome some of the issues with STL and OBJ files. AMF files may express more complicated geometry and numerous materials and colors. AMF files aren’t compatible with all 3D printers, and they’re still not very popular.
Here’s a table summarizing the pros and cons of each file format:
File Format | Pros | Cons |
STL | Widely used and compatible with most 3D printers, easy to create and edit | Can be inaccurate, resulting in imperfect prints |
OBJ | More accurate than STL, can handle complex geometries | Larger file size can impact printing time and quality |
AMF | Can contain multiple materials and colors, represents complex geometries | Not widely adopted, not all printers are compatible |
It’s crucial to select the proper file format and confirm that the file is compatible with your 3D printer when setting up a 3D model for printing. It’s crucial to verify with the program documentation or manufacturer to find out which file formats are supported because the majority of slicing software, which turns the 3D model into printed layers, accepts numerous file formats. Your 3D printing will be accurate and of great quality if you select the appropriate file format.
Slicing Software: Preparing Your Model For Printing

The next step is to use slicing software to prepare the 3D model for printing after you have developed or downloaded it. Slicing software creates the G-code that the 3D printer needs to produce the object by breaking down the 3D model into printable layers.
Both free and premium slicing software alternatives are readily accessible. Cura, Simplify3D, and PrusaSlicer are a few well-liked choices.
It’s critical to select software that best meets your goals and degree of knowledge because every piece of software has its distinctive features and capabilities.
To get your model ready for printing, do the following:
- Insert your model into the program used for slicing: The majority of applications can open a wide range of file types, including STL, OBJ, and AMF.
- Adjust the software’s printer settings. This entails deciding on the type of printer and modifying settings like print speed, layer height, and infill density.
- Orient the Model for Printing: A model should be oriented for printing. To provide the best printing and reduce support structures, this entails rotating and placing the model within the program.
- Produce the G-code: The model is transformed into printable layers during this procedure, and the printer’s creation instructions are produced.
- G-code maybe USB- or SD-card-delivered straight to the printer.
The manual or online resources for the printer should be consulted before modifying the slicing software settings because each 3D printer has a different set of printing parameters and settings. Before trying larger or more intricate prints, it’s also advised to start with a tiny, simple print to test the printer and software settings. You can guarantee that your 3D prints are precise and of the highest caliber by utilizing slicing software to prepare your model for printing. To determine which software and settings are ideal for your particular needs and printer, don’t be afraid to experiment. You’ll quickly become an exceptional 3D printmaker with a little practice.
3D Printing Tips And Tricks

Even though 3D printing is an amazing technology, there are times when prints don’t come out as you had hoped. Here are some pointers and strategies to improve the quality of your 3D prints:
- Make Use of a Raft: A raft is a layer of material that is printed beneath the model to create a firm foundation and to increase adherence to the build plate. When printing objects with small bases or thin edges, rafts can be especially useful.
- Add Support Structures: Overhangs and bridges that might otherwise collapse during printing are made by adding support structures. They are frequently created automatically by slicing software and can be eliminated after printing. To minimize wasting material or increasing print time, the location of supports must be carefully considered.
- Improve Print Speed: Print quality can be impacted by the printer’s movement speed. Faster speeds can shorten the print time while slower rates can enhance accuracy and detail. Test out several print speeds to get the ideal balance for your project.
- Adjust Infill Density: The quantity of material utilized to fill the inside of the print is referred to as the infill density. A lower density can shorten print times and use less material while a greater density can increase the print’s strength and longevity.
- Use Bridging: Printing across voids between supports is referred to as bridging. Although this can be a challenging process, changing settings like print speed and temperature can increase the success of bridging
- Monitor Temperature: Keep an eye on the temperature because it might affect the print’s quality and the material’s adherence to the build plate. Verify the printer’s temperature settings and keep an eye on the print for any problems caused by temperature.
- Clean the build plate: Clean the build plate to increase adhesion and reduce the chance of prints coming apart or warping while being printed. The build plate should be cleaned in between prints using isopropyl alcohol or another cleaning agent.
You may get better outcomes and higher-quality 3D printing by using the advice in this guide. Always be patient and don’t be afraid to try out various settings and methods to see what best suits your requirements. You’ll quickly become an exceptional 3D printmaker with a little practice.
Post-Processing Work

After a 3D print is finished, there are frequently some post-processing steps that can be taken to enhance the object’s appearance and functionality. Following are some popular post-processing methods:
- Cleaning: The print may need to have a residue or support structures removed depending on the type of 3D printing material used. A knife, pliers, or piece of sandpaper are just a few of the equipment that may be used for this. Given that some materials might be abrasive or generate fine dust, it is crucial to protect your hands and respiratory system when cleaning the print.
- Sanding: If there are obvious layer lines or rough surfaces on the print, sanding might help smooth them out. To lightly smooth the print’s surface, use sandpaper with a fine grain. To prevent breathing in the fine particles, sanding should be done in a well-ventilated location while using a dust mask.
- Painting: To add color and texture to the print, the paint may be used if desired. Since they dry quickly and adhere well to most materials, acrylic paints are a common choice for 3D prints. Before painting, it’s crucial to apply a primer to make sure the paint adheres correctly.
- Coating: To provide a protective layer to the print and increase its endurance, coatings like varnish or epoxy can be employed. To achieve the desired impression, these coatings can also give the print a glossy or matte surface
- Assembly: Assembly may be necessary if the print consists of many components. Depending on how the print is designed, this can either be done with glue or screws.
A 3D print’s look and usefulness may be significantly enhanced by post-processing. Post-processing can be time-consuming and even untidy, but it is crucial to keep in mind that not all prints need it. Researching the particular needs of each material is vital since certain materials might not be appropriate for particular post-processing methods. Post-processing may be an enjoyable and inventive approach to improve your 3D prints and elevate them. Have fun with the process and remember to follow the essential safety measures whether you’re coating, painting, or sanding your print.
Troubleshooting Common 3D Printing Issues

A fun and fulfilling pastime, 3D printing has its problems, just like any other technology. Here are some typical problems with 3D printing, such as failed prints and inconsistent quality, along with solutions:
- Problems with print quality: Poor print quality is one of the most prevalent 3D printing problems. Layer shifting, warping, or stringing are a few examples of the different ways that this could appear. Check the printer’s settings and make sure the print bed is level and the nozzle is at the appropriate height before proceeding with any other troubleshooting to address print quality concerns. Other parameters that may need to be changed include print speed, temperature, and cooling.
- Adhesion issues: Prints failing to stick to the print bed or coming away from it during printing are another frequent problem. The improper adhesive may be used, an unclean or uneven print bed, the inappropriate bed temperature, or any number of other things may contribute to this. An alternative adhesive, such as a glue stick or hairspray, can be used to solve adhesion issues. Other possible solutions include cleaning the print bed with rubbing alcohol, modifying the bed temperature, or trying these.
- Extrusion problems: Under-extrusion and over-extrusion can occur when the extruder is not operating properly. When there is insufficient material extruded by the printer, under-extrusion happens, producing prints that are brittle or lacking essential details. Over-extrusion happens when the printer extrudes too much material, producing lumps or rough surfaces. Start by examining the filament feed, tension, nozzle, and extruder temperatures to diagnose extrusion problems.
- Jams and clogs: When filament becomes caught in the nozzle or extruder, jams and clogs take place. A filthy nozzle, a nozzle that is worn out or the wrong size, or the use of low-quality filament are just a few of the causes of this. Clogs and jams can be resolved by using higher-quality filament, a nozzle replacement, a nozzle cleaning tool, or soaking the nozzle in a solvent.
- Electrical problems: Electrical problems like power surges or voltage drops might cause the printer to break down or cease functioning completely. Make sure the printer is connected to a reliable power source and examine the wiring and connectors for damaged or lose connections before beginning an electrical troubleshooting process.
- Problems with software and firmware: 3D printing can also be affected by faults with the slicing software or firmware. Inaccuracies in the slicing procedure, improper printer settings, or out-of-date firmware might all fall under this category. Make sure you are running the most recent versions of the software and firmware while troubleshooting software and firmware problems, and verify that your printer’s settings are set up properly.
3D printing is a difficult and complicated process, but the majority of problems can be fixed with some troubleshooting. You can guarantee that your prints are of the highest caliber and that your printer is operating at its peak efficiency by being aware of the typical problems that might occur during 3D printing and being able to resolve them. When utilizing any 3D printing equipment, always heed the manufacturer’s instructions and safety precautions, and enjoy the experience!
Are 3D Printers Banned in Pakistan?
In Pakistan, the usage of 3D printers is governed by government regulations rather than being outright prohibited. Guidelines for the import and sale of 3D printers have been released by the Pakistan
Telecommunication Authority (PTA), and it is mandatory for all users to register their equipment with the PTA. The PTA’s regulations are intended to stop 3D printers from being used for illicit activities like making explosives or weapons. Some have countered that the rules would discourage innovation because they are overly onerous.
In Pakistan, there are several businesses selling 3D printers, and these devices are growing in popularity. But it’s crucial to remember that 3D printing is still a relatively new technology in Pakistan, and many people are unaware of the potential risks involved.
To Know More CLICK HERE
Advanced 3D Printing Techniques

New methods are being created that enable even higher accuracy and complexity in produced things as 3D printing technology develops. Here are some cutting-edge 3D printing strategies you might want to investigate:
- Multi-material printing: This technique enables the production of things with a variety of hues, textures, and materials. This method is carried out with the use of specialist printers that can change between various materials and nozzles during printing. For the creation of elaborate and complex items that need several materials or colors for various parts, multi-material printing is appropriate.
- Variable layer height printing: With variable layer height printing, distinct layers of the item are printed at varied heights, enabling more accuracy and detail. This method is perfect for producing elaborate or complexly curved things that need a high degree of precision.
- Support-free printing: This method enables the generation of objects without the requirement for support frameworks. The most effective approach to printing the object without the need for extra support structures is determined by analyzing its shape using specialist software.
- Stereolithography: A liquid resin is used in stereolithography (SLA) 3D printing technology, which is then cured by a laser or UV light. This method enables the production of extremely accurate, finely detailed items with a smooth surface finish.
- Power Bed Fusion: A laser or an electron beam is used in the powder bed fusion process to join layers of powdered material to form solid objects. Using this method, which is frequently used for metal printing, it is possible to make objects that are very strong and long-lasting.
These cutting-edge 3D printing methods demand specialized tools and knowledge, but they provide fresh and intriguing opportunities for producing intricate and detailed products. There’s always something new to learn in the realm of 3D printing, whether you’re investigating multi-material printing or experimenting with variable layer height.
Industry Applications Of 3D Printing

The growth of 3D printing technology has had a big effect on many fields, such as medicine, cars, space travel, and many more. It is no longer only a tool for hobbyists. Listed below are some instances of how 3D printing is utilized in business:
- Medical: The creation of prostheses, implants, and surgical models is being done via 3D printing. The use of 3D printing technology enables the creation of personalized implants and prostheses for each patient, resulting in a more accurate and cozy fit. Additionally, to aid surgeons in training and enhance patient outcomes, surgical models can be developed.
- Automobiles: The production of parts and the creation of prototypes are both accomplished using 3D printing in the vehicle sector. Prototypes may now be produced fast thanks to technology, allowing businesses to test and improve designs more swiftly. Additionally, 3D printing can be used to manufacture low-volume parts, which can be more affordable than using conventional manufacturing processes.
- Aerospace: The development of lightweight components with intricate geometries is being facilitated by 3D printing in the aerospace sector. Instead of utilizing conventional manufacturing techniques, this technology enables the production of parts that are stronger and more resilient. A further benefit of 3D printing is the ability to lighten the component weight, which can improve fuel economy and lower expenses.
- Architecture: Building and structural models and prototypes are made using 3D printing in the field of architecture. With the use of this technology, architects can swiftly build and test designs, which can assist to lower mistakes and enhance the entire design process. In addition, complicated architectural features that would be challenging or impossible to manufacture using conventional manufacturing techniques may be produced utilizing 3D printing.
- Jewelry: The development of distinctive and complex designs is being facilitated by 3D printing in the jewelry sector. Complex forms and textures that would be challenging or impossible to make with conventional production techniques are now feasible for jewelry designers thanks to technology. Custom products made for specific clients can also be produced via 3D printing, which may improve client happiness and loyalty.
We can anticipate even more cutting-edge applications of 3D printing in a range of industries as technology progresses. The way we design and produce goods is changing thanks to 3D printing, which may be used to make lightweight aircraft components or personalized medical implants.
Future Of 3D Printing

It’s great to see how 3D printing is constantly evolving and becoming more exciting! It’s exciting to think about all the new possibilities that will come with advancing technology! We’ll likely see some cool new applications and innovations in many different areas. Hey there! I’ve got some cool trends and predictions to share with you about the future of 3D printing.
With the advancements and cost-effectiveness of 3D printing technology, we can anticipate seeing more of it being used in manufacturing. 3D printing has some cool benefits compared to traditional manufacturing methods. For example, it can help create intricate shapes and minimize waste.
Did you know that 3D printing is starting to be integrated with AI and robotics? It’s a pretty cool trend that’s happening right now! With this integration, you’ll be able to create even more intricate and accurate 3D-printed items, and the printing process will be more automated. Have you heard of bioprinting? It’s a really cool field that uses 3D printing to create biological materials. It’s developing really quickly too! Wow, this technology is amazing! It could really change the medical field by making it possible to create organs and tissues for people who need transplants.
Did you know that 3D printing can help us become more sustainable? It’s true! By reducing waste, 3D printing has the potential to make a positive impact on our environment. It’s exciting to think about how 3D printing technology is advancing and becoming more environmentally conscious with the development of eco-friendly materials and processes. It sounds like this technology could allow for personalized clothing and accessories, and even the ability to print replacement parts for household items.
The future of 3D printing looks very promising, with lots of opportunities for new ideas and expansion. It’s exciting to think about how technology will keep advancing and bring new applications and developments that will change the way we design, create, and manufacture products.
FAQ
Most frequent questions and answers
When the object is finished, you must use a spatula or another tool to remove it from the build platform of the printer.
To make sure your 3D printer runs correctly, you should clean it frequently and according to the manufacturer’s maintenance recommendations. This may entail cleaning the construction platform, repairing worn components, and lubricating moving parts.
The size, complexity, and printing speed of an item all affect how long it takes to print. While larger, more complex objects can take several hours or even days to complete, smaller ones can often be completed in a few minutes.
Depending on the printer, there are several loading procedures. In most cases, you must open the filament or resin cartridge of the printer and load the substance in accordance with the guidelines provided by the producer.
To get your 3D model into a printable format, you will need to utilize slicing software. In order to do this, you must choose the proper printer and material parameters.
To get your 3D model into a printable format, you will need to utilize slicing software. In order to do this, you must choose the proper printer and material parameters.